
Jobs required included getting some light glass cloth and ply and deal with all the cracks, bangs and bashes, being careful not to add to much weight. There was also some work to do on the gunwhales. In particular the port aft end was no longer firmly attached to the topsides and needed some TLC. After that the most awful job of all, filling and fairing. All the little scrapes where I wasn't quite careful enough with the paint scraper to fill! Then more sanding - and dust, and finally some paint. One pot polyurethane rather than two pot on the old wooden boat - I'm of the opinion that two pot polyesters are just a bit too unyielding for old woood boats and tend to peel off in one piece. Of course I might be talking nonsense, but its my experience of varnish...
The easiest source for lightweight materials is the local model shop (if you have one of the sophisticated ones that stocks raw materials, not just plastic kits). Unlike vendors for "full size" boats they won't look at you oddly if you ask for 2mm ply or very lightweight glass cloth. You do, however, pay a premium in cost, which I guess is inevitable as they have to handle materials in such small quantities. Don't forget it costs a shop pretty much the same amount of money to order and sell 10 one foot square sheets of 2mm plywood as it takes to order and sell 10 fifty square foot pieces of 6mm. The local shop, one "Mick Charles Models" seems to have remarkably uncurious staff. I was sure, the day I walked in and asked for enough pieces 3 inch by 2 inch square balsa wood to make a twenty foot beam (this was when I was restoring the Bethwaite mast) I'd have registered some sort of curiosity, but the definite impression was that this was completely a normal and everyday occurrence. There must be some very big models out there.
What I eventually elected to do was to use a piece of 2mm plywood ex the local model shop to fill the hole after trimming back to good wood. I then covered the are with 3 overlapping layers of very light glass in order to taper off the edge of the glass cover, making it both a bit less obtrusive and minimising hard spots.
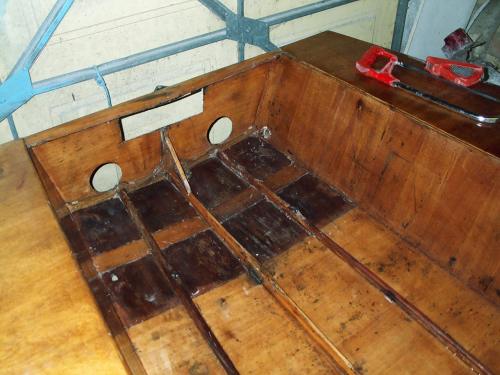
Here the two skins of the floor go down to one, as noted elsewhere, and the plywood is definitely very weak. I've covered the whole area with a layer of very light (25gsm) glass cloth, and added several more layers where there is specific damage. This doesn't really blur the outlines too much, and from a reasonable distance/passing glance it still looks like a normal wood structure. I'm fairly happy about this area now on the inside, although still some more to do on the outside as mentioned above.

And
here is the freshly glued and glassed rear floor. Funny how it
always looks loads better before you put the varnish - or in this
case epoxy - down. The exposed outer skin really looks very patchy
and discoloured, and there's still bits of black paint in scratches
and dents that I didn't really want to dig into. Short of immerisng
the whole boat in industrial strenth paint stripper and having
it fall apart there's a limit to what you can do with this.
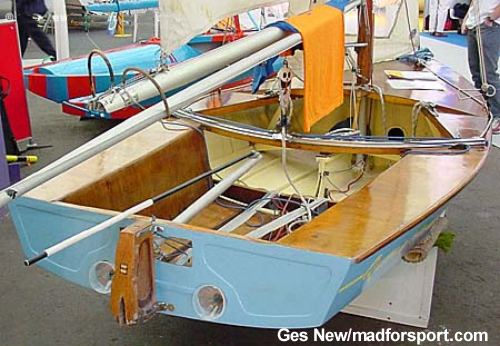
The crew area is more of a problem. There is just so much glass, carbon and everything else there keeping the original wood in some sort of order that restoring to bare wood seems a thankless task. As I had a sudden need (qv) to get the old lady in some sort of order to go to the Sailboat show in 2002 we got rather short of time, and in the end my friends at Smilie Marine did some painting, and we just painted the crew cockpit a sort of vaguely beige colour...

Getting ready for the show was a game in itself as there was a sudden need to find all sorts of bits and fittings from different places. The rudder stock shown above is one I made for either this boat or its predecessor many years ago, but I had neither tiller nor extension. The old style tiller extension came off the rudder gear for an old single hander I had a few years ago, but the tiller needed making. Thinking vaguely 70s the tiller itself is a piece of tapered alloy tube (actually the top of an alloy sailboard mast) There's then a little laminated wooden piece that sockets into the tiller and into the stock - one being round and one square. It was astonishingly quick to knock up - epoxy and microballons hides a lot more approximate carpentry than Aerolite used to! Other fittings came from the vastoffs from the derelicts pile at the Sailing club. The boom is ex Fireball hastily shortened and cropped, but with various Kiwi fittings on - fortunately I had these from the original boom, in spite of the latter now being on the bottom of Chichester harbour - don't ask!
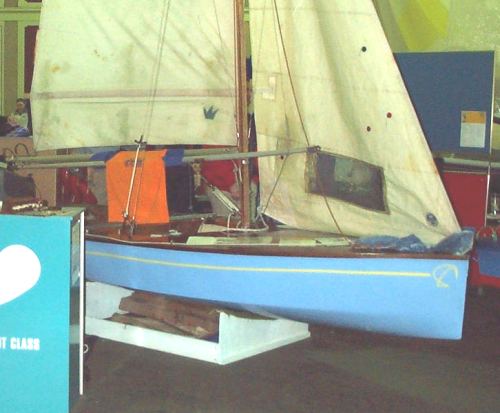
Sails came out of the shed covered with rust. I couldn't get a lot of this off, just had to put up with it. You can see it in the photo below. Everyone tells you the witches brews recommended will work given enough time and effort, but I had neither.
