

The boat needed to be redecked after a shroud failure sent the mast spanner through the foredeck. No repair was going to look very good, and I've long nursed a desire to return the bow area to a more original format. In addition the nice piece of stripy sapele face ply I had was completely inauthentic, Kiwi boats being typically decked in whichever pieces of plywood at the timber merchants were lightest and stiffest, no matter if they looked like old packing cases... However that was just the start...
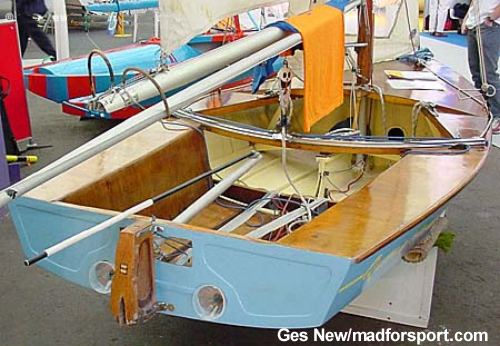
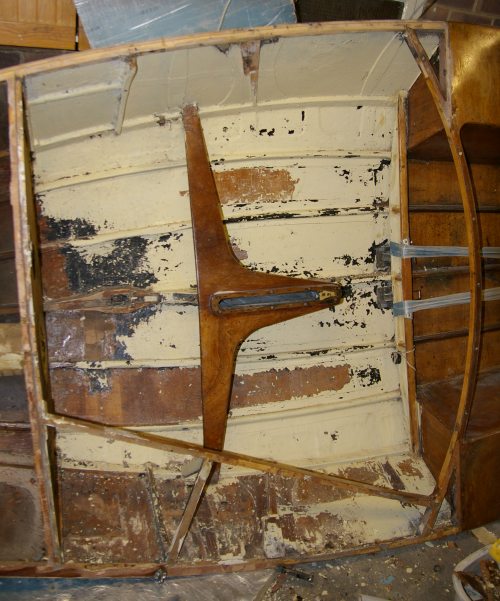
Basically I think that the boat is suffering from a major attack of Aerolite failure. This otherwise excellent adhesive seems to have a lifespan of about thirty years or so before it becomes brittle and ceases to be effective. Whereas when I replaced the foredeck and the crew deck in around 1989 - with the glue about 18 years old - the undelying beams and structure were all fine, now I'm approaching the task again twenty years on its quite a different story. Today I gave up thinking that I could avoid removing the curved beam across the boat that supports the traveller. It was just too poorly attached to the boat and its a crucial structural component. Next is, I fear, going to have to be the main centre beam at floor level. This actually lost a component last year, which I put down to abuse, but I now suspect that the glue was at least as much a part of the problem. Before I take that out though I probably ought to build some temporary braces - there isn't much structure left... Compare now with how she looked at Sailboat in 2002. Still, at least that dreadful cream paintin the cockpit is going slowly...
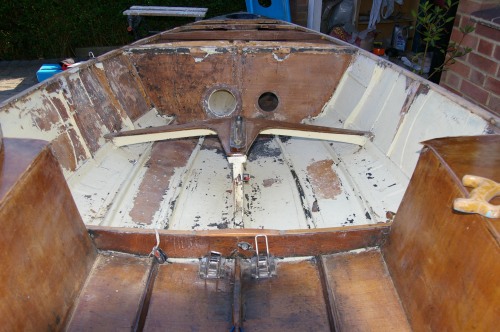
Those who have read these pges before may recall me talking about nasty suprises, something that is familiar to all who work on old wooden boats. This time I came across a bunch of irritations once I had taken the crew side decks off and started cleaning up the various deck beams. Basically they weren't especially well attached to anything - the thirty five year old aerolite resin had failed, as it does, so various key structural components have been mainly held together tradition, deck plywood, and the odd mechanical fastener. Worse still those odd bolts and screws had worked and somewhat chewed up the end of the beams. So realistically they all had to come out, and really should be replaced. So out they came. You can also see the slow and untidy progress at stripping the paint off... And yes, you're right - she is leaning up against the wall rather than sitting horizontally on a stand. Its a lot less back breaking to work in the cockpit that way and leaves a lot more space in the garage!
All this reconstruction should give me a better chance of returning to an original style foredeck layout, although the forensic evidence for what that might have been is limited. The original setup has been gone over twenty five years at least - and may not have been compatible with the deck stepped wing mast. The original arrangement included what we called a spigot back then, which can be thought of as a stump of alloy mast section in the hull onto which the actual mast was sleeved. This gave the stability of a hog stepped mast supported at deck level without breaching the class rule requiring a deck stepped mast.
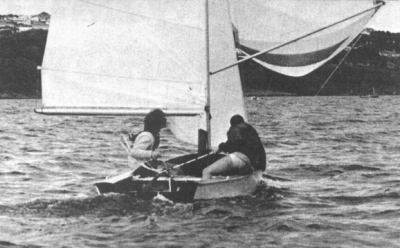
Unfortunately there's not much information available. I have this from New Zealand's "Sea Spray" Magazine. Mark Paterson's new boat QSJB might have been the first to feature a new trend in the search for lighter weight. His boat had no side buoyancy tanks from for'ard bulkhead aft to the mainsheet traveller. This idea has several merits; less weight, can't leak and trap water, fittings can be positioned under the deck, more cockpit space, and easier to right after a capsize [snip] QSJB had three different jib positions, one inside the other, and when using the inside one could point noticeably higher than the rest of the fleet. Not a lot to go on is it? There's also this rather muddy photograph, taken from behind, which to my eyes seems show a full length foredeck, maybe slightly more raised then it is now.
The first stage is to remove the old deck. This can be done as carefully or carelessly as you desire - I suppose the best thing would be to take it off in large sections with a chisel, but I tend to cut some holes where there are definitely no frames and then work outwards bashing pieces off *upwards* with a rubber mallet, which probably does the remaining structure no good, but leaves pieces small enough to fit in the wheelie bin, and relieves my childish destructive instincts... In this case there was a ready made hole to start from, which was the cause of the whole adventure. I should note that my destructive method is fine when dealing with 3mm ply decks as found on Cherubs, Canoes and other sensibly light boats, but if you are working on a more conventional boat with 6mm ply or something then the brute force required is liable to be far more than is safe, and I think cutting out pieces with a jig saw would be more advisable. Make sure you don't saw up any beams or other internal features though.
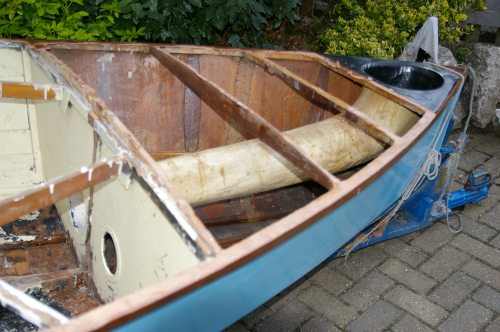
The next stage is to take a sharp chisel and a wooden mallet - about a one inch (25mm) chisel is a good size, and remove all the remaining ply. Use the chisel with the bevel edge downwards so that the blade tends to lift out of the work rather than dig deep into the underlying deck beams. You should aim to get well down into the bottom veneer of plywood, but try to go no farther than the glue in order to avoid damaging the stripwood underneath. The chisel should on no account be your best carpentry chisel - you are likely to damage the edge on stray fastenings, dull it on old epoxy resin and abuse it in numerous other ways. Keep an old chisel for this sort of job. Keep it sharp though. I reckon that lowest veneer/glue is about the right point to stop with the chisel because of the risk of getting through the hard glue into the softer stripwood beneath. The last of the veneer and the majority of the glue will be removed later with a power sander.
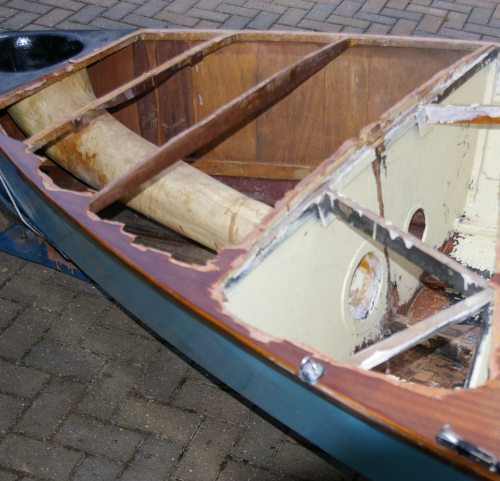
In these photos the starboard side has been taken down with a chisel to the bottom ply layer, but the port side is untouched. The other thing you can do at this stage is to use the opportunity to remove all the odd drips of glue from when the decks were put on. If you have doubts about any of your buoyancy tanks this is also the time to redo the joins really carefully, and seal from the inside as well as the outside.
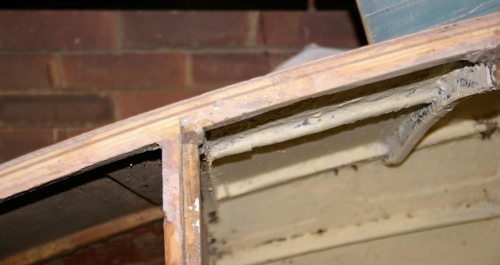
Once the ply is off, or any time you fancy doing something loud, as mentioned the rest of the ply can be taken off with a belt sander. You do need to do this with some discretion though, its suprisingly easy to get the odd lump and bump in the deck. Arm yourself with a flexible steel rule so you can check that the gunwhale is staying fair. Lay it across the surface and bend to the curve of the sheerline. Of course if the sheerline is straight so much the easier. This photo shows (fractionally out of focus I'm afraid) about the point where I think you should stop. All the old ply is gone, but much of the surface is still covered with a translucent layer of thin epoxy. This only applies, of course, if the previous glue is still well attached and in good condition. If its thirty year old aerolite then it all has to come off...
Much more to come over the next few months... The next stage will be rather slow though. I have some bits of work to do which are unrelated to a standard redecking project. The first is to remove all the paint aroud the crew cockpit and investigate the possibilities of rturning her to a varnish finish. The aesthetics of this will depend on how the extensive areas of glass and carbon resulting from the wave at Weston look when the covering layers of paint have been removed. There's also a need to replace some of the original areas of glass reinforcement on the topsides, tidy up various old topsides repairs and beef up a very highly curved single skin area in the bow where the inside veneer of plywood seems to be cracking up after some thirty five years of being tortured ply...